PSI values in minutes, not days
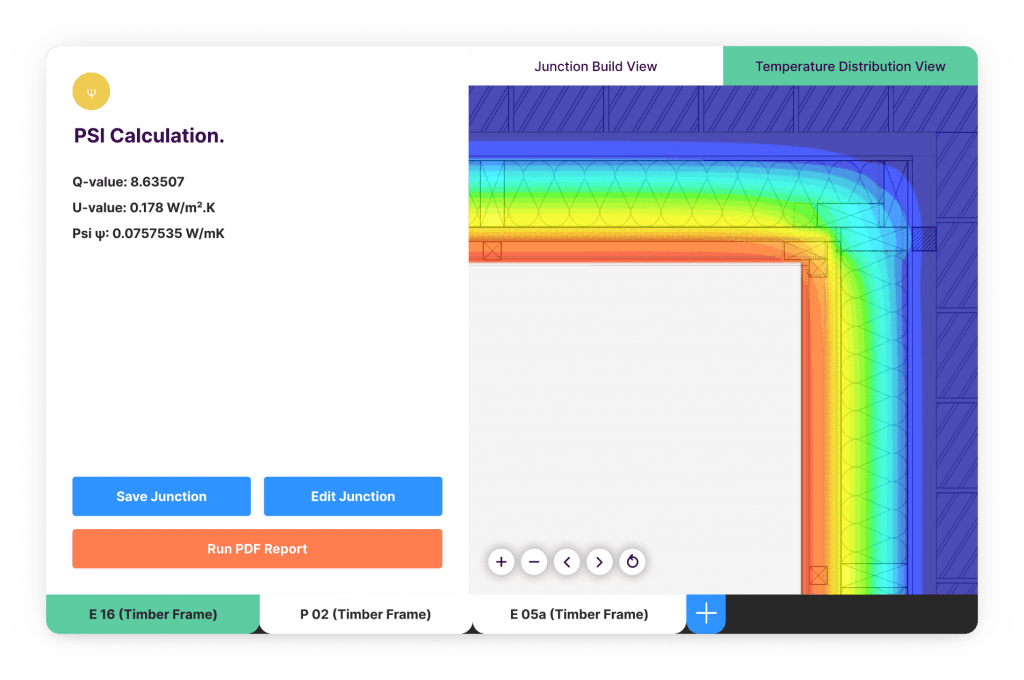
Thermal bridging doesn’t need to slow down your project. AutoPSI makes 2D thermal modelling quick and straightforward, so your team can calculate accurate, defensible Ψ-values in minutes without waiting on a specialist.
From detail to Ψ-value in four simple steps
No specialist training, nothing to install, and no waiting on someone else's queue.
Pick the junction
Start from the template library for standard details, or draw your own in Free Draw when the detail is bespoke.
Build it up
Drag and drop layers and bridges, and set materials from the library or your own with bespoke K-values.
Calculate
The Ψ-value and fRSI come back in minutes, from a calculation that meets BR497 and BS EN ISO 10211.
Change it and run it again
Adjust a layer, recalculate, compare. Iterating costs you nothing, which is what makes modelling at design stage worth doing.
More modelling. Less waiting.
Thermal bridging can quickly become a bottleneck. Every junction needs to be modelled, checked and sometimes modelled again as details change, all while the SAP assessment is waiting for the final values.
AutoPSI makes that process faster. With calculations taking minutes rather than days, you can model more junctions, test alternatives and respond to design changes without slowing down the assessment.
- No software to install: AutoPSI runs entirely in your browser
- Unlimited calculations on every plan, so you can iterate as often as you need
- Shared junction and material libraries on Teams, keeping everyone working from the same values
Generic values describe a generic building
Both routes to avoiding modelling have the same flaw: the number describes someone else's junction, not yours.
Before
Defaults and published details
Table K1, or a standard detail
- SAP Table K1 must cover the worst plausible version of each junction type, so it assumes the cautious answer
- Published construction details describe one specific build-up: assumed insulation, assumed thickness, assumed closer
- Change the insulation, the cavity width or the closer and the published Ψ no longer describes what you are building
- Accredited Construction Details were withdrawn under the Part L 2021 uplift
- Either way, good detailing earns you nothing: the number is the same however well it is built
After
Your actual junction
Modelled in AutoPSI
- The calculation runs on your materials, your dimensions and your detailing
- Better detailing produces a better number, so design effort is rewarded
- BR497 and BS EN ISO 10211:2017 Annex C compliant, usable directly in the SAP submission
- Model the junctions that repeat across the site, where the difference compounds
- Future-proofed for the Home Energy Model, which replaces SAP for new homes
Why modelled beats generic, including accredited details
The argument against defaults is well understood: Table K1 is deliberately conservative, because a default has to be safe for the worst case it might be applied to. Modelling your own junction reclaims that margin.
The argument against published construction details is less obvious but matters just as much. A recognised or accredited detail is a real calculation, but of one particular construction, with a particular insulation at a particular thickness and a particular cavity closer. It is accurate for that. The moment your specification differs, and it usually does, the published Ψ-value stops describing your junction. You are still using someone else's number, just a better-researched one.
This is also why generic details cannot reward good design. Two housebuilders detailing the same junction to very different standards claim the same Ψ-value, because both are quoting the same published figure. Modelling is the only route that lets better detailing show up in the assessment.
Start with whichever junction repeats most across the site, then work down by length: the longer a junction runs, the more its Ψ-value matters. Which junction details require PSI values walks through the list, and Accredited Construction Details covers what was withdrawn and why.
For the principle behind it see what PSI values are and what thermal bridging is.
Common questions
What is a Ψ-value?
A Ψ (psi) value measures the additional heat loss at a junction, where the building fabric changes direction or material, and where a plain U-value calculation stops describing what is happening. It is expressed in W/mK. See what PSI values are for a fuller explanation.
What is SAP Table K1?
Table K1 is the table of default Ψ-values in SAP. It offers a generic figure for each junction type based on an assumed construction, so it can be applied without any modelling. The convenience is real, but so is the penalty: the value is deliberately conservative, because it has to cover the worst plausible version of that junction.
Do I have to use bespoke PSI values?
No. Defaults remain a valid route to compliance. The question is what they cost you. Because Table K1 figures are conservative, they typically overstate heat loss, and that has to be made up elsewhere in the fabric or the services. Bespoke values are worth calculating wherever a junction repeats often enough for the saving to outweigh the modelling.
What is the Home Energy Model?
The Home Energy Model (HEM) is the methodology replacing SAP for assessing the energy performance of new homes. Moving away from outdated default values now means your approach carries across rather than needing to be revisited.
Which junctions should I model first?
Start with whichever junction repeats most across the site, because the saving multiplies by every instance. Then work down by length: the longer the junction runs, the more the Ψ-value matters. Which junction details require PSI values walks through the list.